")
Tired of scrolling through endless braid styles without knowing which ones are actually worth trying? Whether you’re a braiding novice or a seasoned pro, finding the right style can feel overwhelming.
The beauty of braid hairstyles lies in their versatility – they work for every hair type, length, and occasion. However, not all braiding techniques are created equal, and some definitely deserve more attention than others.
We’ve consulted top hairstylists to bring you 15 foolproof braid styles that specifically combine classic techniques with modern trends. From quick five-minute styles to more intricate designs, these hairstyles inspo picks are guaranteed to turn heads in 2025.
15.Classic French Braid with a Modern Twist
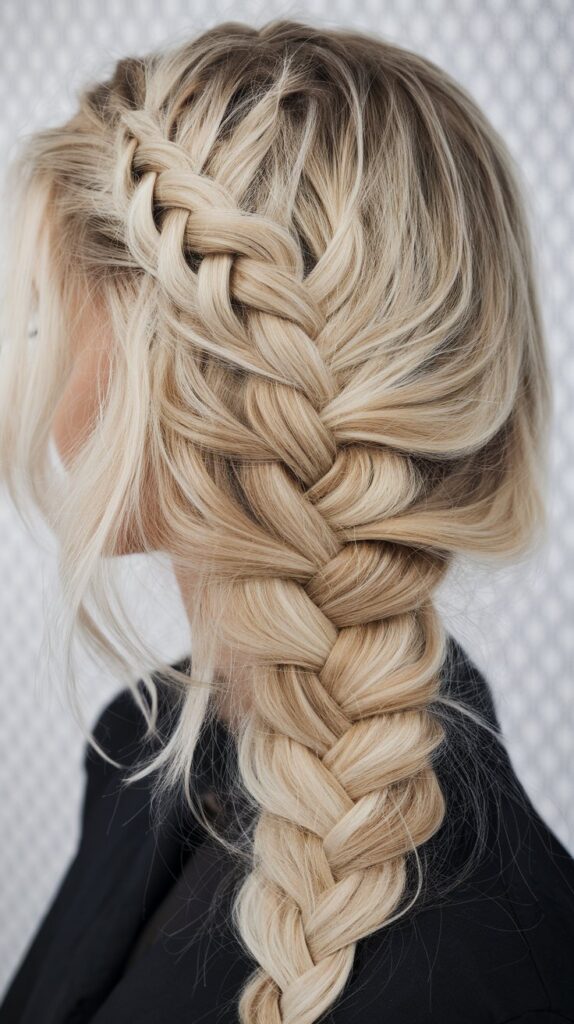
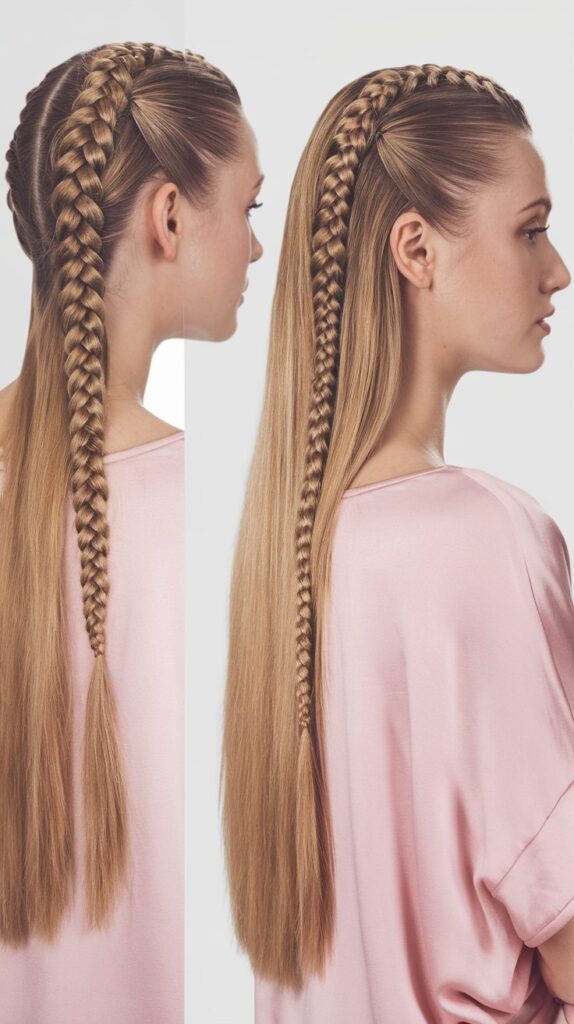
The French braid remains a timeless favorite among hairstylists, offering versatility for both casual and formal occasions. This classic style gets a modern update through precise techniques and contemporary styling methods.
Step-by-Step Tutorial
Start with unwashed hair for better texture and grip. Begin by dividing your hair into three equal sections at the crown. Hold the strands close to your scalp while braiding to maintain tightness. Cross the right section over the middle, followed by the left section. As you braid, gradually incorporate additional hair from each side into the corresponding sections.
Styling Tips from Experts
Professional hairstylists recommend tilting your head down when braiding the nape area for a tighter finish [2]. Initially, create a tighter braid that can be loosened later for a more relaxed look [3]. For added texture, apply a small amount of dry shampoo before braiding.
Common Mistakes to Avoid
Many beginners make the mistake of braiding too loosely at the nape, resulting in saggy sections [4]. Furthermore, attempting to create a loose braid from the start often leads to an unstable structure. Additionally, using a mirror can actually hinder the braiding process, as it reverses the image and complicates hand movements [5].
Maintenance Guide
To maintain your French braid, sleep on a silk or satin pillowcase to reduce friction. For active days, secure any loose strands with bobby pins matching your hair color [6]. The style typically lasts longer when created with slightly textured hair rather than freshly washed locks [1].
14.Bohemian Dutch Crown Braid
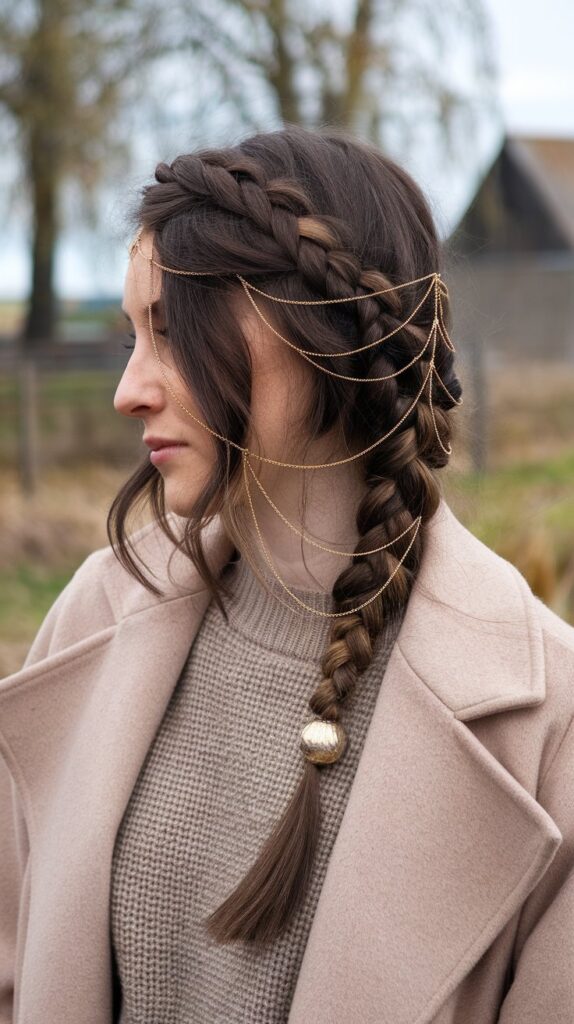
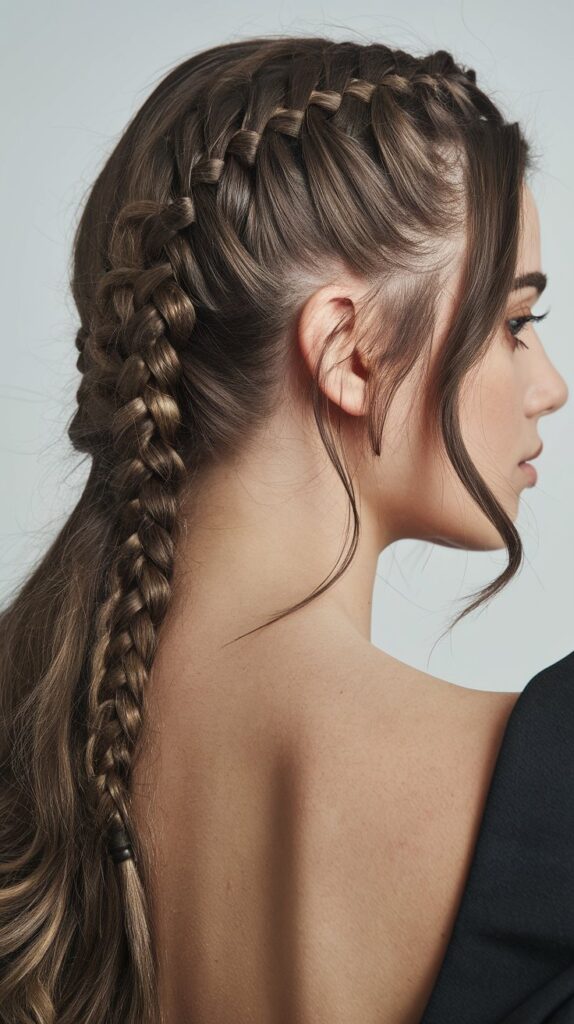
The Bohemian Dutch Crown Braid combines elegance with a carefree esthetic, creating a slightly messy yet sophisticated appearance [7]. This versatile style works exceptionally well for both formal events and casual occasions.
Essential Tools and Products
A successful Dutch crown braid requires specific tools for optimal results. Primarily, you’ll need:
- Paddle brush and rattail comb for sectioning
- 4-6 bobby pins for securing
- Medium-hold hairspray
- Hair sectioning clips [8]
Braiding Technique
Begin with second or third-day hair, as the style works best with some texture [9]. Create an extreme side part, notably farther than usual. Start the Dutch braid close to the part, crossing sections underneath rather than over each other [8]. Simultaneously incorporate roughly one-inch slices of hair from surrounding areas as you braid.
The key distinction of this style lies in crossing the strands underneath while braiding, consequently creating a raised, rope-like appearance [7]. As you reach the back of the head, reposition your hands to accommodate the braid’s direction. Continue braiding around the head, securing the end with pins behind where the braid begins [9].
Styling Variations
The bohemian crown braid offers multiple styling options. For a more relaxed look, gently pull on the braid’s edges to create width and fullness [8]. Moreover, you can incorporate twists and smaller sections of hair to achieve an authentic boho vibe [7]. For special occasions, consider adding decorative elements like boho beads or cuffs to enhance the carefree esthetic [10].
13.Sleek Box Braids

Box braids stand as one of the most effective protective hairstyles, offering both style versatility and hair protection. First of all, proper preparation and installation are crucial for optimal results.
Preparation Steps
A thorough pre-treatment routine begins with a protein treatment on dry, unwashed hair [11]. Subsequently, apply a deep moisture-rich conditioner for 10-15 minutes [11]. For enhanced results, cover hair with a plastic cap and use heat for better product penetration [12].
Installation Process
The installation time varies based on braid size and stylist expertise. Small braids typically require 8-12 hours, medium box braids take 5-8 hours, and jumbo box braids need 4-6 hours [11]. During installation, parts should remain smaller than half an inch to minimize tension on the hair strands.
Aftercare Tips
Proper maintenance ensures longevity and scalp health. Primarily, moisturize your braids 3-5 times weekly using a water-based spray [12]. Clean your scalp weekly with natural cleansing oils or diluted shampoo applied through a nozzle applicator bottle [12]. Essential aftercare includes:
- Weekly scalp cleansing with diluted shampoo
- Regular moisturizing with lightweight oils
- Nightly protection with a silk or satin scarf
- Gentle handling to prevent frizz
Duration and Maintenance
Box braids typically last between four to six weeks [13]. Accordingly, experts recommend not keeping them installed longer than two months to prevent potential damage [13]. For extended wear, consider getting the hairline and nape redone at the six-week mark [12]. Regular scalp oiling and proper nighttime protection help maintain the style’s freshness throughout its duration.
12.Fishtail Side Braid

Creating an elegant fishtail side braid requires precision and patience, yet the final result offers a sophisticated look perfect for any occasion [14].
Sectioning Technique
First, brush your hair thoroughly to remove tangles and create a deep side parting [15]. Following this, gather all hair to the opposite shoulder of your parting – if parted on the right, sweep hair to the left shoulder [16]. For better grip and control, consider using second or third-day hair, as the natural oils help maintain the braid’s structure [1].
Braiding Method
The fishtail technique involves working with two main sections instead of the traditional three [17]. Divide gathered hair into equal halves and hold them separately. Take a pencil-sized section from the outer edge of one half, cross it over to join the opposite section [14]. Next, repeat this process from the other side, maintaining consistent tension throughout. Continue alternating between sides, keeping sections small for an intricate finish [16].
Styling Options
The versatility of fishtail braids allows for multiple styling variations:
- Create a tousled look by gently pulling apart the braid’s edges
- Add texture with a light-hold hairspray for extra grip
- Incorporate decorative elements like ribbons or hair accessories [17]
Primarily, the key to a perfect fishtail lies in maintaining even tension while braiding [18]. For a more relaxed appearance, massage the braid gently between your hands, creating that sought-after bohemian effect [1]. Finally, secure the style with a clear elastic band, ensuring it remains intact throughout the day [16].
11.Knotless Braids
Knotless braids represent a significant advancement in protective styling, primarily distinguished by their innovative feed-in technique that eliminates traditional anchor knots [19].
Benefits and Features
This modern braiding method stands out for its painless application and remarkably lightweight feel [19]. The technique begins with natural hair, gradually incorporating extensions mid-braid, therefore creating a flatter, more natural-looking result [4]. Particularly beneficial for those with sensitive scalps, these braids allow immediate styling flexibility without waiting for loosening [4].
Installation Process
The installation typically requires 4-7 hours, depending on desired size and length [5]. First, stylists start with the natural hair, followed by carefully feeding in extension hair throughout the braiding process [4]. Although the process takes longer than traditional box braids, the results justify the additional time investment [20].
Maintenance Tips
Proper care extends the life of knotless braids up to 8 weeks [19]. Essential maintenance includes:
- Weekly scalp cleansing with diluted shampoo or apple cider vinegar
- Regular moisturizing using lightweight oils
- Nightly protection with silk or satin scarves
- Gentle handling to minimize frizz [21]
Cost Considerations
The price range for knotless braids varies significantly, altogether spanning from USD 200.00 to USD 600.00. Factors affecting cost include:
- Braid size (smaller braids cost more)
- Hair length desired
- Stylist expertise
- Geographic location
- Additional styling elements like bohemian curls or color blending
10.Bubble Braid Ponytail
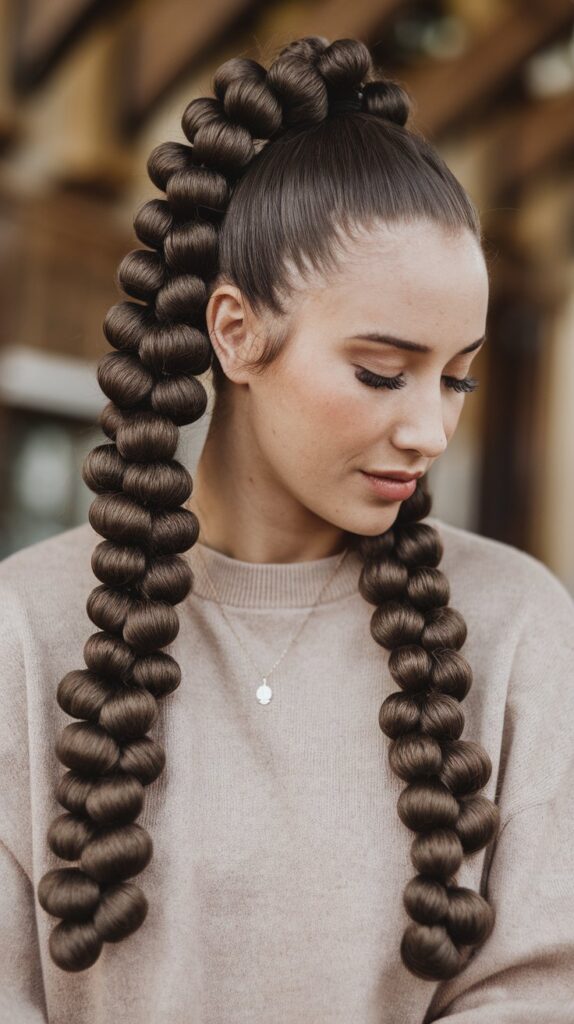
Transform a basic ponytail into an eye-catching style with the bubble braid technique, a modern take on traditional braiding that requires minimal expertise. This playful update to standard ponytails offers a sophisticated look while demanding less skill than traditional braiding methods [23].
Required Tools
For a flawless bubble braid, gather these essential items:
- Leave-in conditioner for smooth foundation
- Styling cream or gel for hold
- Clear or hair-colored elastic bands
- Light-hold hairspray
- Rat-tail comb for sectioning
Creation Steps
Begin by prepping damp hair with styling cream to establish a frizz-free base [23]. Secure hair into a slicked-back ponytail at your desired height, positioning it close to the scalp. Place additional elastic bands at one-inch intervals down the length of your ponytail [3].
For optimal results, gently tease each section between the elastics to create rounded, bubble-like shapes. Primarily focus on maintaining equal distances between bubbles to ensure a balanced appearance [23]. In essence, the art of achieving a “messy” look demands more precision than creating a slicked style [2].
Styling Variations
The versatility of bubble braids extends beyond the basic style. Furthermore, consider creating double bubble braids by splitting hair into two sections [3]. Likewise, experiment with a half-up style by stopping the bubbles just above ear level [3]. For special occasions, enhance the look with bedazzled hair pins or temporary color sprays to add personality to each bubble [24].
9.Waterfall Braid
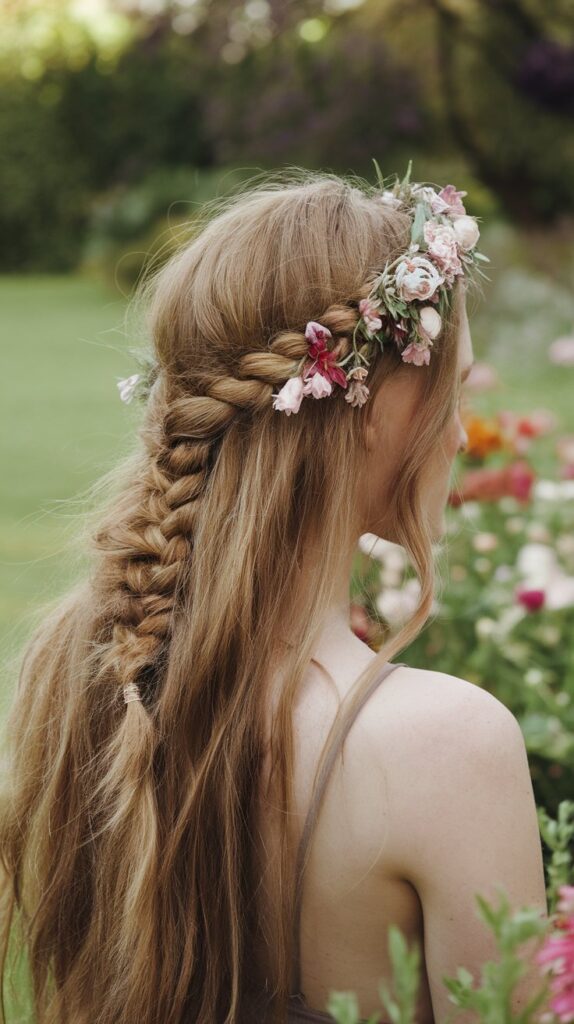
The waterfall braid stands out among popular braid styles for its enchanting cascading effect, where strands of hair appear to flow like a gentle stream down the side of your head [25].
Step-by-Step Guide
First, separate a two-inch section of hair near the front of your head into three equal parts [26]. Next, cross the left strand over the middle, followed by the right strand over the new middle section. Primarily, the waterfall effect emerges as you drop the lower strand and replace it with a new section of hair from the root [27]. Continue this pattern, dropping the bottom piece and incorporating fresh sections until reaching your desired length.
Product Recommendations
Essential items for creating a flawless waterfall braid include:
- Heat protectant spray for pre-styling
- Wide-tooth comb for detangling
- Clear elastic bands for securing
- Light-hold hairspray for finish
- Bobby pins for securing loose strands
Styling Tips
In fact, the waterfall braid works exceptionally well on both straight and curly hair textures [28]. For enhanced grip, consider braiding slightly damp hair coupled with a lightweight styling cream [6]. Generally, the braid appears more intricate when created on second-day hair, as natural oils provide better hold [26].
For a romantic finish, pair the waterfall braid with loose curls, curling the cascading strands after completing the braid [29]. Essentially, the key to a long-lasting waterfall braid lies in securing the end underneath your layers with bobby pins, ensuring a seamless blend with your natural hair [25].
8.Cornrow Braids
Mastering cornrow braids demands proper preparation and technique to achieve both protection and style. This traditional protective style serves dual purposes: safeguarding hair from daily stressors and creating a low-maintenance look [30].
Preparation Steps
Prior to braiding, start with thoroughly clean hair using hydrating shampoo and conditioner rich in coconut water and hyaluronic acid [30]. Blow dry hair with minimal heat to reduce strand weakening. Similarly, detangle hair completely to ensure smooth braiding. For optimal results, apply a lightweight leave-in conditioner to strengthen strands before installation [31].
Braiding Technique
Begin with small triangular sections for neater results. Position your fingers flat against the scalp, maintaining downward pressure while braiding [32]. The key distinction lies in focusing on finger positioning rather than hair quantity – your hands’ natural spacing determines how much hair gets incorporated [32]. Primarily, keep palms moving in the braiding direction, remembering that hair pickup occurs only in the middle section [9].
Maintenance Guide
Proper upkeep ensures both style longevity and scalp health:
- Cleanse scalp weekly using diluted shampoo
- Apply lightweight oils mixed with water for hydration
- Avoid heavy products that cause buildup
- Protect braids nightly with silk or satin scarves [31]
Duration
Cornrows typically last between two to eight weeks [33]. Nevertheless, experts recommend removal after 4-5 weeks to prevent potential scalp issues [34]. Watch for signs indicating removal time: excessive frizz, significant loosening, or scalp discomfort [31]. Most importantly, allow your hair at least one month of rest between installations to maintain scalp health [31].
7.Rope Twist Braid
Rope twist braids offer a unique blend of simplicity and sophistication, making them an excellent choice for both beginners and experienced stylists. This technique creates a distinctive twisted rope-like pattern that holds up remarkably well in various weather conditions [35].
Tools Needed
A successful rope twist requires minimal but specific tools:
- Basic brush and comb for detangling
- Small elastic bands for securing
- Light-hold hairspray
- Leave-in conditioner (optional)
- Sectioning clips [36]
Twisting Technique
First, start with clean, brushed hair and create a deep side part [36]. Next, divide your chosen section into two equal pieces. The key to a perfect rope twist lies in the direction of your movements – twist both strands in the same direction (typically toward your face), then cross them in the opposite direction [36].
For a French rope twist variation, incorporate small sections of hair from both sides before each crossing motion. Hence, this technique creates a more intricate, secure style that stays in place throughout the day [36].
Styling Options
The versatility of rope twists extends beyond basic styles. Thus, you can create elegant updos, casual side braids, or even overnight waves [35]. For a formal look, twist the entire head of hair into a sophisticated crown braid. Primarily, these braids work exceptionally well for those with bangs or face-framing layers, as the twisting motion keeps shorter pieces securely in place [36].
A properly maintained rope twist can last between six to eight weeks [37]. For optimal results, dampen your hair slightly before styling, but avoid excessive moisture as it needs to dry completely [35]. Additionally, this style proves particularly effective for managing oily hair, as the natural oils enhance the braid’s grip and shine [35].
6.Butterfly Braids

Butterfly braids blend artistry with practicality, creating a distinctive style through unique wrapping techniques and textured loops. This innovative approach to braiding offers both visual appeal and practical benefits.
Installation Process
The installation begins with sectioning clean hair into medium-sized portions. Presently, stylists use water wave hair or kinky hair extensions, folding them in half to create uneven lengths [38]. Straightaway, the braiding process starts with a basic plait extending about two inches from the scalp. The longer portion of the extension wraps around the braid, creating signature butterfly-like loops by periodically placing your thumb to create texture [39].
Maintenance Tips
Proper care markedly extends the life of butterfly braids:
- Wear a bonnet or silk scarf nightly
- Apply lightweight scalp serum weekly
- Keep braids thoroughly dry after washing
- Avoid heavy styling products [40]
Style Duration
Undeniably, butterfly braids offer impressive longevity when properly maintained. The style typically lasts between 4 to 6 weeks [41]. Forthwith, experts recommend monitoring for signs of excessive frizz or loosening, which indicate the need for removal. The installation time varies between 3.5 to 6 hours, depending on the desired size and quantity of braids [39]. For optimal results, professionals suggest scheduling touch-ups around the hairline at the four-week mark to maintain a fresh appearance [40].
5.Pull-Through Braid
The pull-through braid creates an illusion of intricate braiding while primarily consisting of cleverly positioned ponytails. This deceptively simple technique produces a voluminous, eye-catching style that appears more complex than its execution.
Required Tools
Success with pull-through braids demands specific tools for optimal results. A set of clear elastic bands forms the foundation of this style, alongside small sectioning clips for temporary hold. Additionally, a rat-tail comb ensures precise partings, whereas a basic brush helps maintain smoothness throughout the process [42].
Creation Steps
- Begin with a small ponytail at the crown
- Secure a second ponytail directly beneath the first
- Split the top ponytail into two sections
- Pull the bottom ponytail through the divided top section
- Create a new ponytail incorporating the split sections
- Continue this pattern until reaching the nape [8]
For best results, maintain consistent tension throughout the process. The technique typically requires 5-7 minutes for completion, making it an efficient choice for time-conscious styling [43].
Styling Variations
The versatility of pull-through braids extends beyond basic execution. First, create a fuller appearance by gently pulling apart each section after completion. Next, experiment with double-sided variations by parting hair down the middle [44]. For added dimension, incorporate small accent braids or twists before starting the pull-through technique. The style holds exceptionally well in second-day hair, offering both practicality and visual appeal [45].
4.Squared Braids

Combining traditional African braiding with modern styling elements, goddess braids stand as a testament to protective styling innovation. First of all, proper preparation ensures optimal results and scalp health.
Preparation Process
Begin with a thorough cleansing routine using a protein-free shampoo and hydrating conditioner [46]. Above all, detangle hair meticulously with a wide-tooth comb, starting from ends to roots. For optimal results, apply a lightweight leave-in conditioner, avoiding heavy products that might cause buildup [47].
Installation Steps
The installation process begins with dividing hair into four equal sections [46]. For this purpose, create clean partings using a rat-tail comb. The distinctive feature lies in incorporating curly or wavy extensions throughout the braid length or exclusively at the ends [48]. Under those circumstances where volume is desired, add more extension pieces – typically five to six sections per braid [7].
Aftercare Guide
Maintaining goddess braids requires consistent care for maximum longevity. Primarily, protect the style nightly with a silk bonnet or scarf [10]. Essential maintenance includes:
- Weekly scalp cleansing with diluted shampoo
- Regular moisturizing with water-based sprays
- Light application of natural oils
- Gentle detangling of loose curls
The style typically lasts four to six weeks [46], though experts recommend removal after six weeks to prevent potential damage [48]. As a result, proper maintenance not only extends the life of your goddess braids but also protects your natural hair underneath.
3.Halo Braid
Elevating traditional Dutch braiding techniques, the halo braid creates an ethereal crown-like effect that frames the face beautifully. This sophisticated style demands attention to detail and proper technique for optimal results.
Sectioning Method
First, create a deep side part, positioning it one to two inches above the ears [49]. Next, divide hair into two distinct sections, ensuring one side remains notably fuller than the other. Primarily, success relies on clean, precise partings that facilitate seamless braiding around the head’s circumference.
Braiding Technique
Begin the Dutch braid near the part, crossing hair sections underneath rather than over [50]. The key distinction lies in picking up hair exclusively from underneath while braiding, which creates the signature raised effect [50]. Soon after reaching the ear area, reposition your hands to maintain consistent tension as you work around the nape [51].
Styling Tips
For a polished finish, secure the braid’s end with clear elastic bands and tuck it discreetly beneath the fuller portion of the plait [52]. Indeed, the style’s fullness can be enhanced by gently pulling at individual braid sections, creating a more voluminous appearance [52]. Certainly, maintenance requires:
- Wrapping hair in silk or satin scarves nightly
- Using lightweight oil or spray for frizz control
- Avoiding excess moisture to preserve the style [53]
For special occasions, consider incorporating small accessories or flowers to enhance the crown-like effect. Meanwhile, the style typically maintains its integrity for several days when properly secured with bobby pins and a medium-hold hairspray [54].
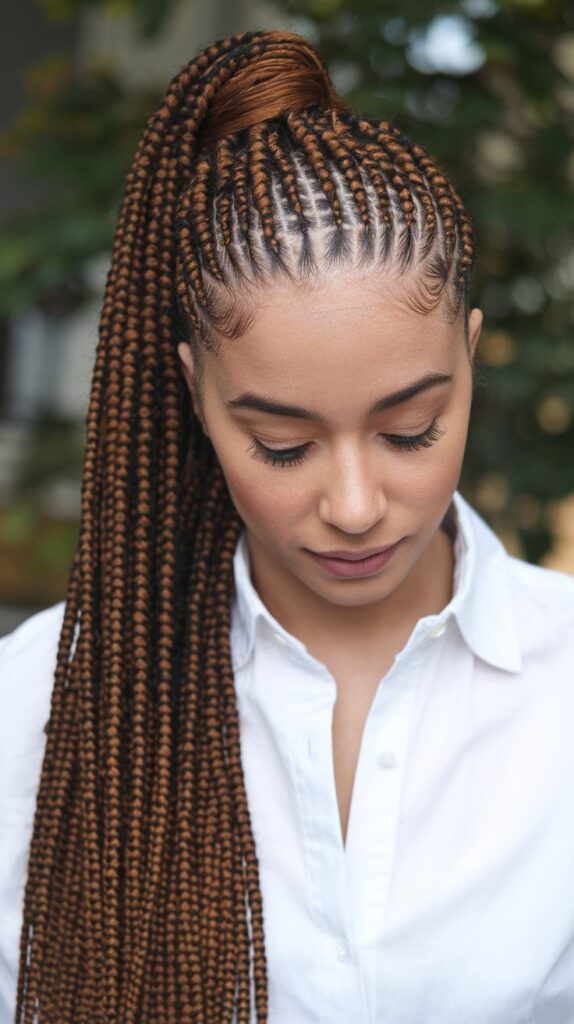
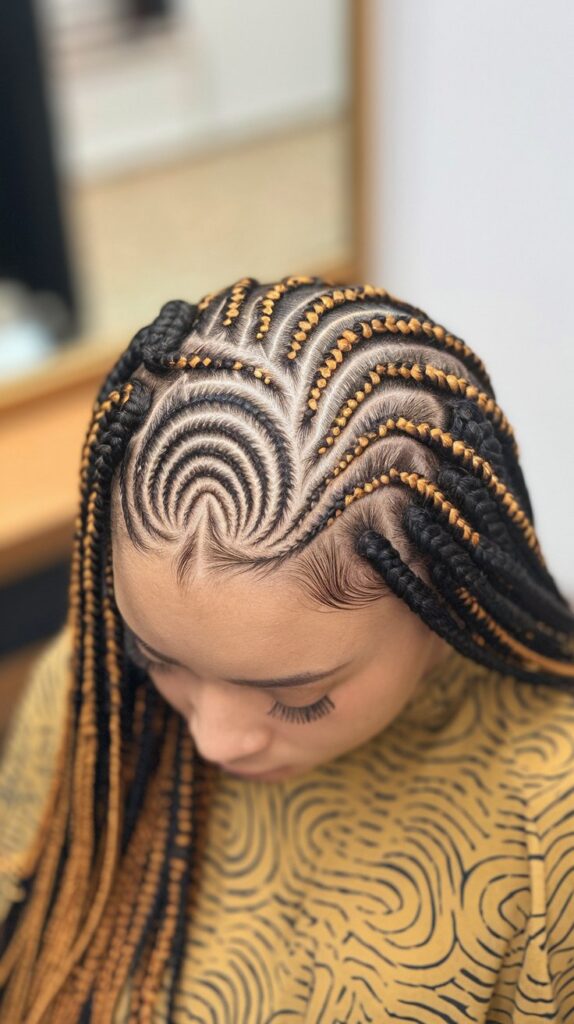
2.Fulani Braids
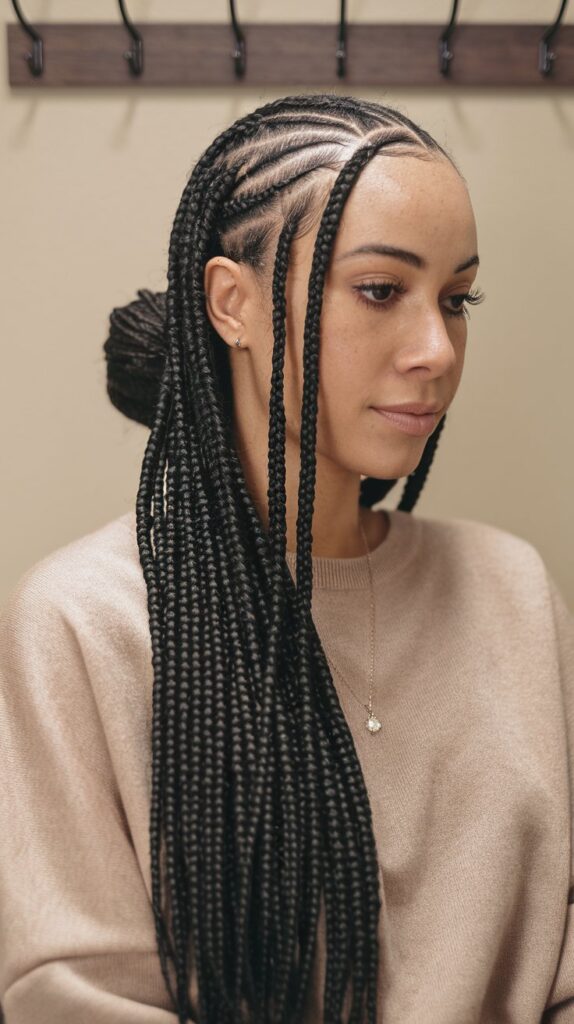
Originating from the Fula people of West Africa, Fulani braids showcase centuries of cultural heritage through intricate patterns and distinctive designs [55]. First and foremost, these braids historically symbolized various aspects of identity, from marital status to social standing within communities [55].
Traditional Technique
The authentic Fulani style features at least five braids that either hang or loop on the sides, culminating in a central bun [55]. Primarily, the technique incorporates cornrows in the front and box braids in the back, with unique patterns containing thin-to-medium tightly plaited braids [55]. The installation process typically spans 4 to 6 hours, demanding precision and expertise [55].
Modern Variations
Contemporary adaptations have gained prominence through celebrity endorsements, with artists like Alicia Keys and Beyoncé showcasing these braids on red carpets [55]. Ordinarily, modern styles incorporate geometric patterns, metallic accents, and decorative elements such as:
- Cowrie shells for traditional esthetics
- Beads for personalized flair
- Hair jewels for contemporary appeal
- Copper wire for unique accents
Maintenance Guide
The style typically lasts between 3 to 6 weeks [55]. Nonetheless, proper care extends longevity and maintains scalp health. Wrap hair nightly with silk or satin scarves to prevent moisture loss and friction [55]. In addition, keep the scalp clean using lightweight products, avoiding heavy oils that might cause buildup [12]. For those who exercise frequently or swim, protective caps and anti-itch sprays help preserve the style’s integrity [55].
1.Micro Braids

Precision and patience define micro braids, a meticulous protective style featuring ultra-thin braids that create a strand-like appearance. These delicate plaits offer versatility while protecting natural hair.
Installation Process
The installation demands significant time commitment, ranging from 4-8 hours for a complete style. Ordinarily, the process extends longer for those opting for smaller, more intricate braids. Besides traditional braiding hair, essential items include:
- Rat-tail comb for precise partings
- Hair moisturizer for strand protection
- Oil-based gel for secure hold
- Small elastic bands for securing
Care Instructions
Primarily, maintaining micro braids requires consistent attention to both scalp and strands. Throughout the style’s duration, cleanse the scalp weekly using diluted shampoo applied through an applicator bottle . After washing, pat excess moisture with a towel and allow braids to dry completely overnight or use low heat . Apply penetrating oils like coconut oil every 2-3 days to maintain scalp health .
Duration Guidelines
Overall, micro braids can last between 4-8 weeks with proper maintenance . Ultimately, experts recommend removal after four weeks for optimal scalp and hair health . Watch for signs indicating removal time, including excessive frizz, significant loosening, or scalp discomfort . A minimum one-month rest period between installations helps prevent potential damage and allows the scalp to recover.
Conclusion
Braid styles stand as timeless expressions of personal style, offering options for every skill level and occasion. These 15 carefully selected styles showcase both traditional techniques and modern innovations, ranging from quick 5-minute bubble braids to intricate micro braids requiring several hours of installation.
Each style brings unique benefits – French braids deliver classic elegance, while protective styles like box braids and cornrows safeguard natural hair. Knotless and Fulani braids blend cultural heritage with contemporary fashion, whereas waterfall and halo braids create eye-catching looks perfect for special events.
Success with any braid style depends on proper preparation, technique, and maintenance. Clean partings, consistent tension, and appropriate products ensure lasting results. Though some styles demand professional expertise, others prove accessible to beginners with basic braiding skills.
These braided hairstyles adapt beautifully across different hair textures and lengths. Whether seeking a practical daily style or an elaborate special occasion look, these expert-approved techniques provide reliable options for creating stunning braided designs throughout 2025.
With Love
Barbara!


